Definitions and Purpose of a Secondary Survey

A Secondary Survey should only be actioned after the Primary Survey has been successfully completed and all casualty treatments have been prioritised.
It should be noted that a Secondary Survey must NEVER be actioned in an Emergency situation if issues arising from the Primary Survey involve life-threatening conditions.
However, if it does go ahead, the purpose is to “drill down” and further examine the effects of an incident or accident. The casualty will be checked closely for any more injuries or symptoms.
This is designed to be the last information-gathering exercise by a First-Aider before the casualty is handed over to Medical Professionals.
Steps of the Secondary Survey

There are three distinct steps to a Secondary Survey:
Step 1 – History
Step 2 – Symptoms
Step 3 – Head-to-Toe Examination for Signs
Step 1 – History (Event History)
The First-Aider needs to be aware of everything that led up to the accident, as well as the personally relevant medical history of the casualty.
So the questioning regarding history will have two considerations:
Event History
This line of questioning will ideally come from the casualty (assuming they are communicating and/or witnesses).
As well as personal accounts, physical or visual “clues” may help understand the set of events that led to the incident.
Direct questioning will be along the lines of:
-
“Exactly what happened?”
-
“How far did they fall?”
-
“When did they collapse?”
History (Previous Medical History)
This line of questioning will focus on the patient’s medical history and status.
This may or may not have some bearing on the accident, but it is crucial to ensure the root cause is fully understood and the casualty is correctly treated.
Targeted questions would include:
-
“What medication is the casualty currently taking?”
-
“When did they last eat?”
-
As well as the presence of medical alert bracelets and prior health conditions
Step 2 – Symptoms

Symptoms can be determined from the feelings and concerns that the casualty describes to you.
Depending on their awareness and other factors, you need to let the casualty fully explain exactly how they feel and any unusual or painful sensations they have.
Whilst it is important to let the casualty speak as much as possible, you must also steer them towards information that can identify their injuries.
This can be gently guided by questions such as:
-
Where do they feel pain?
-
How would they describe that pain (sharp, sustained, aching, etc.)?
-
Is the pain worsened when they breathe or move?
Additional Symptom Questions
Further questions that should be asked include:
-
Is there any pain or sensation that doesn’t seem to have originated from the accident?
-
Do they have other strong sensations apart from pain (dizziness, nausea, etc.)?
-
Do they feel unusually hot or cold or sweaty?
All of this information will aid Medical Professionals to correctly diagnose all injuries once the First-Aider hands over.
Step 3 – Head-to-Toe Examination for Signs

With History and Symptoms covered, the next step is a detailed visual examination.
Using all of their senses (sight, smell, hearing, etc.), the First-Aider should look for signs of further injuries.
It should be kept in mind that the casualty may already be in some distress and anxiety, so sensitivity is essential.
Key guidelines:
-
Always get the casualty’s consent before starting
-
You may need to remove or cut some clothing to examine extremities, but only do this as necessary and explain exactly why you are doing it
Best Practice
-
Do not move the patient in any way more than is absolutely necessary
-
Always start the examination at the head, and move methodically down until you reach the casualty’s feet (do not forget the back)
Signs to look for include:
-
Bleeding
-
Bruising
-
Swellings
-
Deformity of the skin
-
Fluids leaking from the body
-
Noticeable smell of alcohol
-
Ragged or abnormal breathing
Monitoring Vital Signs
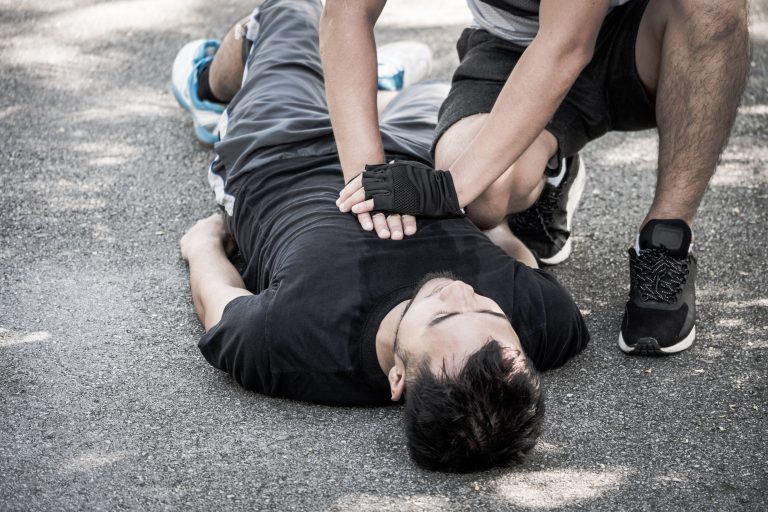
When a First-Aider is examining a casualty, they need to check vital signs to gauge the overall severity of the injuries.
This means listening to their breathing, checking for a steady pulse, and measuring their responsiveness.
It can also spot the early onset of secondary conditions like fevers and hypothermia.
Responsiveness – AVPU Scale
Responsiveness can be measured using the acronym AVPU, which simplifies this part of the examination:
-
Alert – Are they responding quickly to questions and prompts?
-
Voice – Can they respond to and understand voice commands?
-
Pain – Do they respond to pinches of the skin or earlobe?
-
Unresponsive – Are they drifting in and out of consciousness?
Monitoring Vital Signs – Breathing & Pulse
Breathing
Listen to the rate of breathing and note any noticeable difficulties or unusual noises.
-
Children and babies: 20–30 breaths per minute
-
Adults: 12–16 breaths per minute
Look for “smooth” chest movements and any signs of pain while breathing.
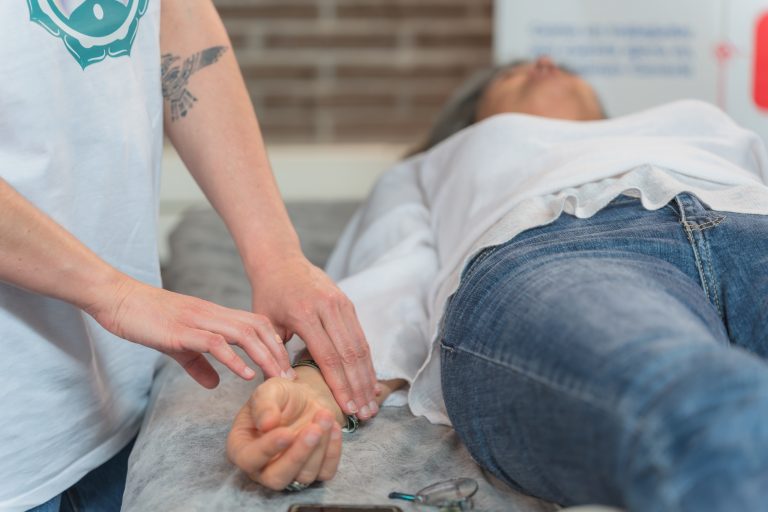
Pulse
Measure the rhythm of the casualty’s heartbeat by checking the pulse in the wrist or neck.
Ensure the beat is regular and uninterrupted, and note any irregularities.
Pain Assessment

Assessment of pain is crucial when deciding the severity of a casualty’s injury.
PQRST is another acronym that can be used to help with a structured process.
Provocation
You may not be able to tell the intensity of pain just by looking at the wound or body. Internal injuries may be susceptible to certain kinds of movement.
Ask if breathing, coughing, or simple movement aggravates the pain.
Quality
How does the casualty describe the pain?
-
Sudden stabbing pain
-
Constant steady ache
This can help identify whether the injury is bone-related, muscular, or nerve-related.
Abdominal and chest pains are always a cause for concern.
Radiates or Refers
Radiating pain starts and spreads out from a single source.
Referred pain is felt in an apparently unrelated location.
Both can be indicative of nerve damage and should be noted.
Severity
Ask the casualty to “mark” their level of pain in their body.
Some people have different thresholds of pain or are sensitive to particular wounds.
A “mark out of ten” allows the First-Aider to gauge discomfort and see if pain is getting worse.
Time
When did the pain begin?
Is it getting better or worse as time progresses?
Everything noted should be handed over to Emergency Services.
How to Examine a Casualty
It is vital that a First-Aider examines a casualty in a thorough and methodical way.
Recommended procedure:
-
Start at the head and check for wounds under the hairline
-
Work your way down the length of the body
-
Do not neglect the back as you move to the lower body
-
Check the entire body, including feet and toes
-
Use the opportunity to check for medical emergency bracelets or other indicators of existing medical conditions
When to Call an Ambulance

After performing a Primary Survey and Secondary Survey (if applicable), a First-Aider will be in a good position to know if Emergency Services need to be contacted.
Before calling an ambulance, you need to evaluate the victim and adhere to the Primary Survey findings.
Call an ambulance immediately if:
-
The casualty is in an area deemed dangerous to others
-
The casualty’s condition is life-threatening or very serious
-
The casualty appears to need immediate medical help during a Scene Survey (suspected heart attack, spinal injury, etc.)
When an Ambulance May Not Be Required
If the casualty has only suffered minor injuries (non-serious wound, burn, etc.), arrange transport to:
-
A hospital
-
A doctor’s surgery
This should be done after First-Aid treatment has been administered.
Summary
In this module, you have learned that:
-
A Secondary Survey must only be carried out once life-threatening conditions are ruled out
-
The Secondary Survey consists of History, Symptoms, and Signs
-
Monitoring vital signs is critical in identifying deterioration
-
Pain assessment provides valuable diagnostic information
-
Clear and accurate information must be handed over to Emergency Services